Photoshop Tutorial: Separating Colors for Screen Printing

If you are new to screen printing, you may not know where to begin when it comes to getting artwork ready for printing. Separating images into colors is an important step. Luckily Photoshop makes this pretty easy. I am going to show you how in just a few easy steps.
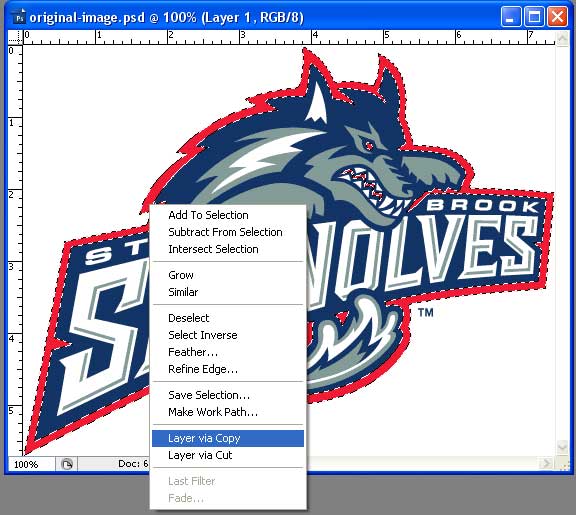
Open your picture in Photoshop. Now select the magic wand tool in the tools panel. Use this tool to select all of one color in the image. If you need to select more than one area, hold the shift key down as you click on the picture. You will see “dancing ants” around the selected areas. If you click on the wrong area, simply press Ctrl+Z to undo the last move, or right click and select Subtract From Selection.

I am going to select the red color first. Then I am going to right click and select Layer via Copy. This will create a new layer with just the red color in it.
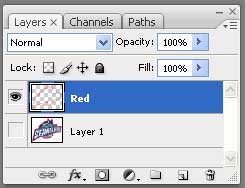
If you look at the layers panel now you will see two layers. Unclick the eye icon next to Layer 1 to hide the layer. You should be able to see just the red layer left in the image. I am going to change the name of this layer to Red by double clicking on the name and replacing the text.
If everything looks right, click the space where the eye icon was before to make Layer 1 reappear. Follow the steps of selecting a color and Layering via Copy again until all colors are represented in their own layers. Each time you select a new color for layering, you will need to make sure Layer 1 is active. You can tell because that layer will be highlighted in blue in the layers panel. Layer 1 needs to be active because this is where all the colors reside originally. If a different layer is active then when you try to use the magic wand tool to select a color, it will not work correctly because the color you are selecting is not present in the active layer.

The blue layer is a little more complicated than the other layers. First of all, I need to make sure I don’t forget the areas inside the letters of STONY BROOK. I will zoom in when I select these areas to make sure I don’t miss anything. Also, if I use the magic wand to select TM it will probably not look crisp when screen printed. So I am not going to select this when I layer the rest of the blue. Instead I am going to create a new layer and use the text tool to rewrite TM. I am going to select Arial font and sent the type at 10pt. Write TM in black and move the TM to the correct location on this image. I am using a different color than the TM was originally written in so it is easy to see if the font is the right size, etc. It looks like this font is a perfect match.
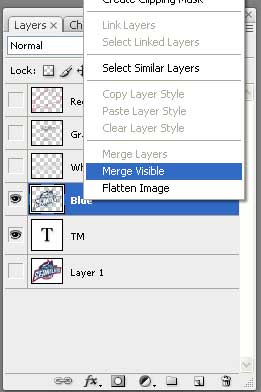
I am now going to hide all the layers in the layers panel except the blue layer and the TM layer. Right click in the layers panel and select Merge Visible. TM and the blue color are now together in one layer.
I need to create registration marks now so the layers are easy to line up when screen printing. Use a thin font like Arial and write the + sign in black in three corners of the image. Use a font size that is easy to see but not too thick or it will be hard to line up. The registration marks need to be far enough away from the image that they do not interfere with printing, but still close to the picture. Once you print a few logos you will get a feel for how to create and place these marks. In this example I used a 48pt font.

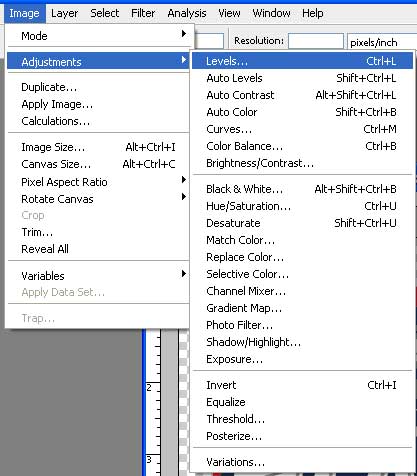
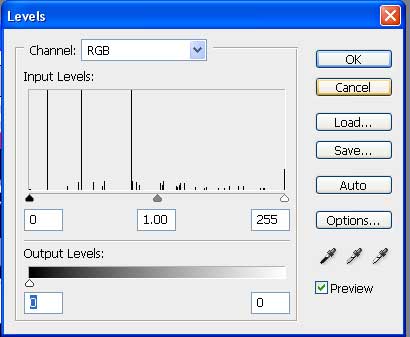
Now select the blue layer. In the file menu go to Image>Adjustments>Levels. The levels options window will pop up. Under Output Levels: there is a black and white bar with two arrows underneath. Click on the white arrow and drag it all the way to the left end of the bar. This will turn the blue layer black.
Do this with each layer until each layer is black. Now you are ready to print. You will want to print each color layer separately in black with the registration marks on each print. Below are picture of how each printout should look. Good luck printing!
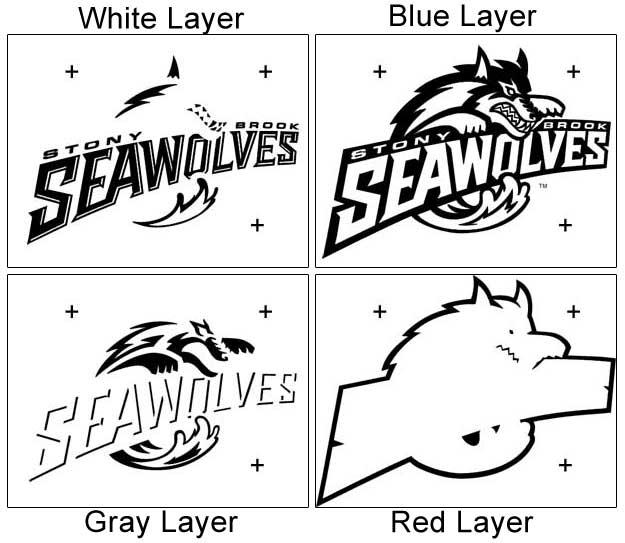
Final Tip: In this example it would actually be a good idea to use the entire logo to print the dark blue layer. This is the layer I would print first when screen printing. If you choose to do this, it will prevent the shirt you are printing on from showing through even if the screens are registered slightly off.